


Table of Contents
Coordinate Warping is a Hotshot technique that warps your party members to any coordinates in the Destination Module that they can reach in the Start Module. Since party member coordinates persist when doing a Hotshot, we can use this to help party members bypass locked doors and reach certain areas early.
While the details of each Coordinate Warp vary from situation to situation, they all follow these two general steps:
Note that Coordinate Warps do not work with Autosave Hotshots; party members will always spawn near the default spawn for the module when performing an Autosave Hotshot.
A Coordinate Warp can be done “within” a module by temporarily Hotshotting to another module that has the coordinates you want, then immediately Coordinate Warping back to the original module. This is used in a few places, and if the save in the temporary module is done in the right position, the two Hotshots can be chained together, commonly called a Double Hotshot.
The type of Double Hotshot you use depends on which module you want that Hard Save to end up in. A Double Neo Hotshot or a Double Quick Save Hotshot will both leave the Hard Save as it was, whereas a Mixed Double Hotshot (a Neo Hotshot followed by a Quick Save Hotshot) will change the Hard Save to the module you’re warping within.
When you Hotshot, the locations that party members spawn in the Destination Module follow this logic:
In addition, if a party member’s coordinates are in-bounds in the Destination Module but on “non-walkable mesh”, then the party member will move to nearby walkable mesh wherever possible. This will cause the party member’s coordinates to change slightly, such as what happens to Carth in the above video example.
The following modules contain the origin (0,0), and thus OoB party members will spawn there for any Hotshot to that module. Modules in italics have the origin in non-walkable mesh:
The following sections contain details for all Coordinate Warps used in each Unrestricted speedrun. Coordinate Warps have a few main uses:
All of the warps list the following information:
Note that only true Coordinate Warps are listed here; Unrestricted runs use many other Hotshots that don’t care about the positions of party members, or specifically want them to be out of bounds to take advantage of the party spawn rules.
Jump to a specific run or warp:
This warp is used to place Bastila on the Walkway closest to the Shadowlands elevator; it is followed by a GP Warp to reach the elevator and the Shadowlands using Bastila.
Positioning Image

Video of Warp
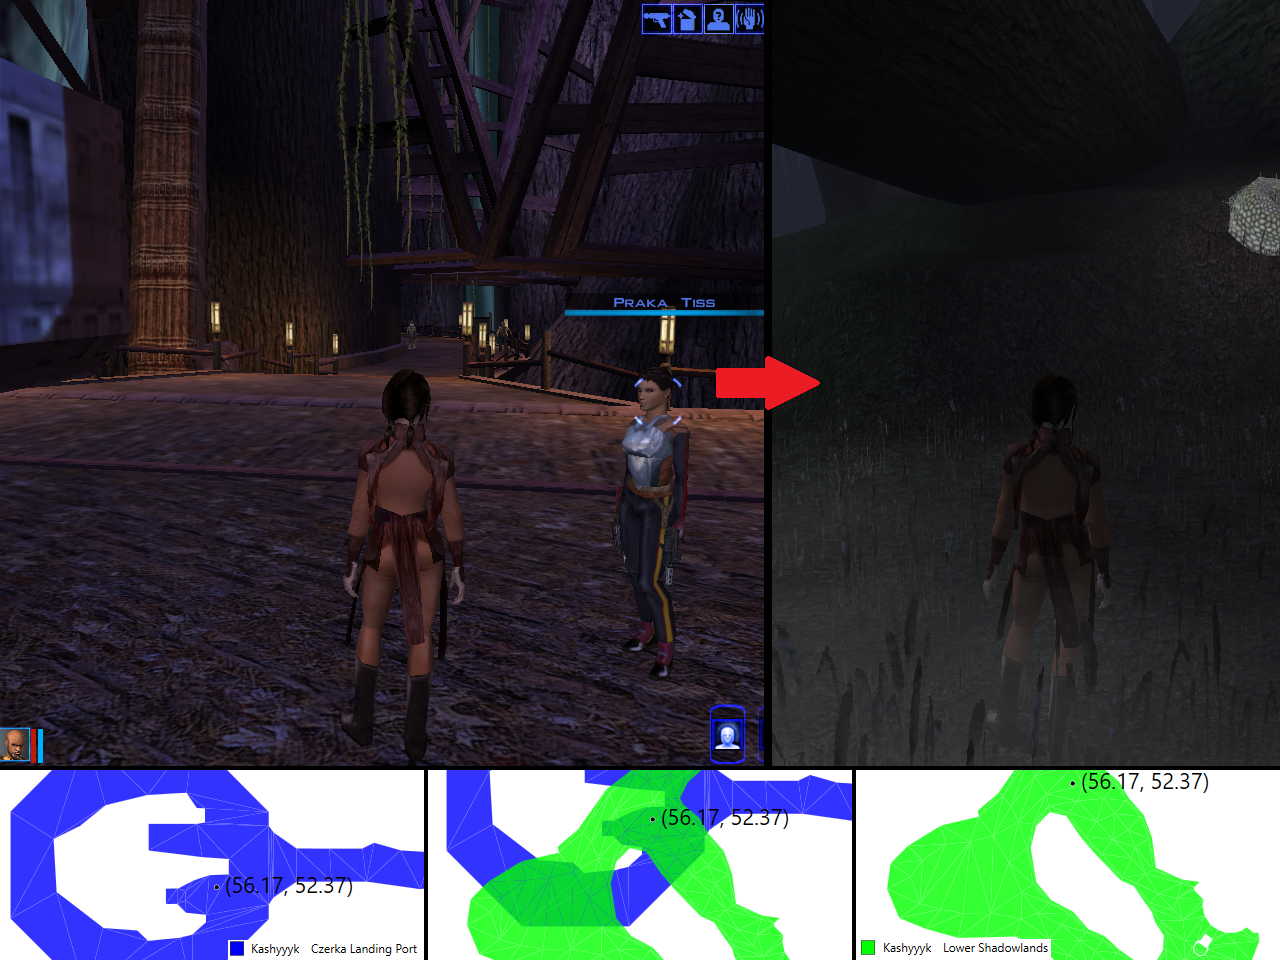
This warp is used to warp Bastila from the entrance of the Lower Shadowlands to a position near the Star Map, saving running and avoiding enemies. Both versions of the warp return to the Landing Port from Lower Shadowlands first; the initial warp uses a Fast Lane to do so, while during The Routine a double QS Hotshot is used instead.
In both cases, Bastila does not need to be positioned within the Landing Port; any of her initial spawn locations will give valid coordinates for the warp back to the Lower Shadowlands.
Positioning Image
Video of Warp
The video above shows the initial warp done with the Fast Lane; for the Double QS Hotshot version done later, see The Routine.
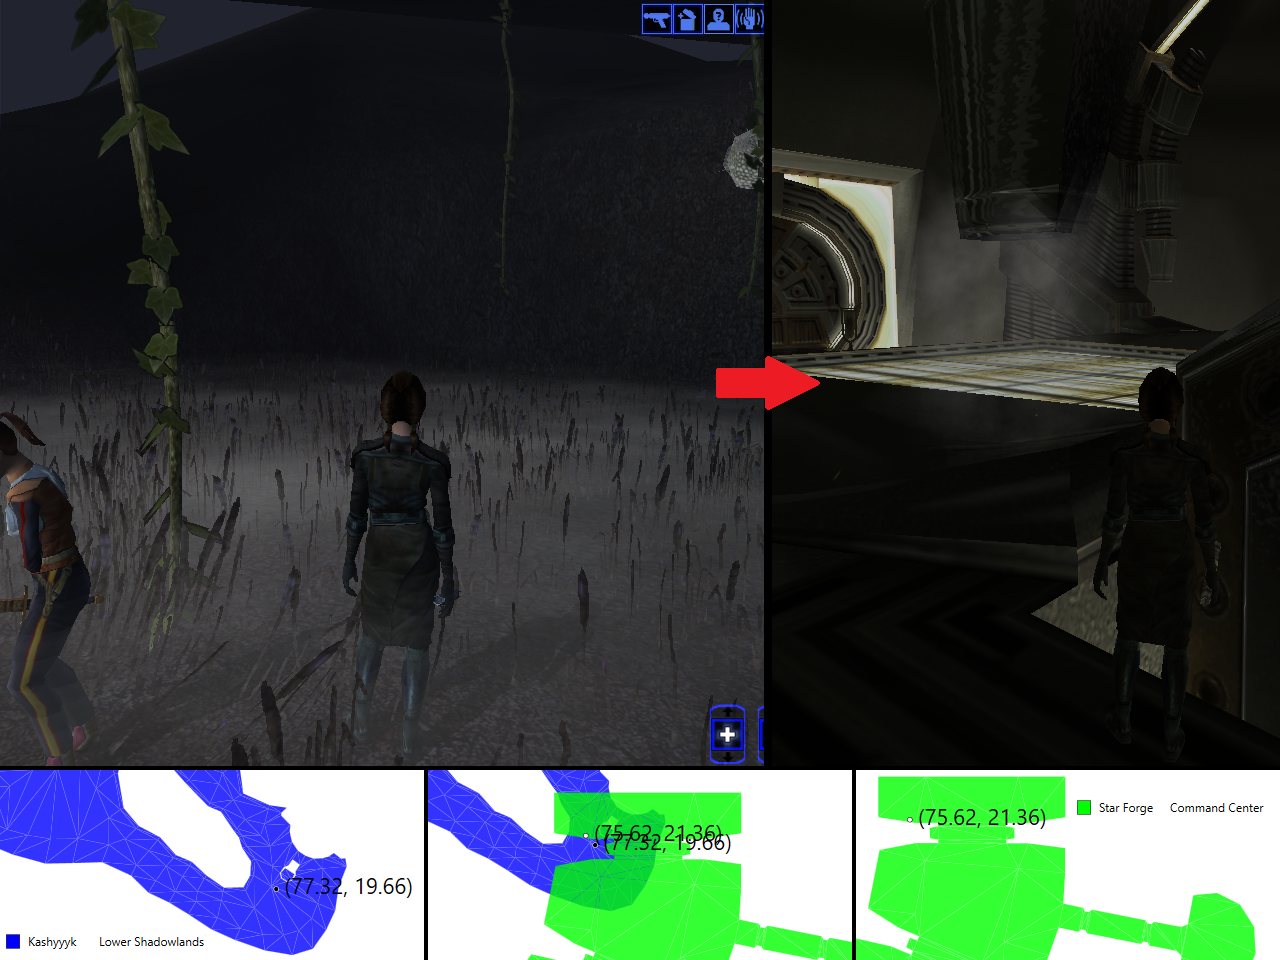
This warp is used to send Bastila from the start of the Command Center to the end in one fell swoop, skipping all fights and movement in the Command Center. Note that Bastila typically spawns onto non-walkable mesh during this Coordinate Warp, so her coordinates change slightly.
If the MC’s position is correctly set before leaving the Lower Shadowlands for the last time, then Bastila does not need to change positions while performing this warp.
Positioning Image
Video of Warp
In addition to the warps listed below, All Star Maps also does the Landing Port to Great Walkway warp and the Lower Shadowlands to Command Center warps listed above in Any%.
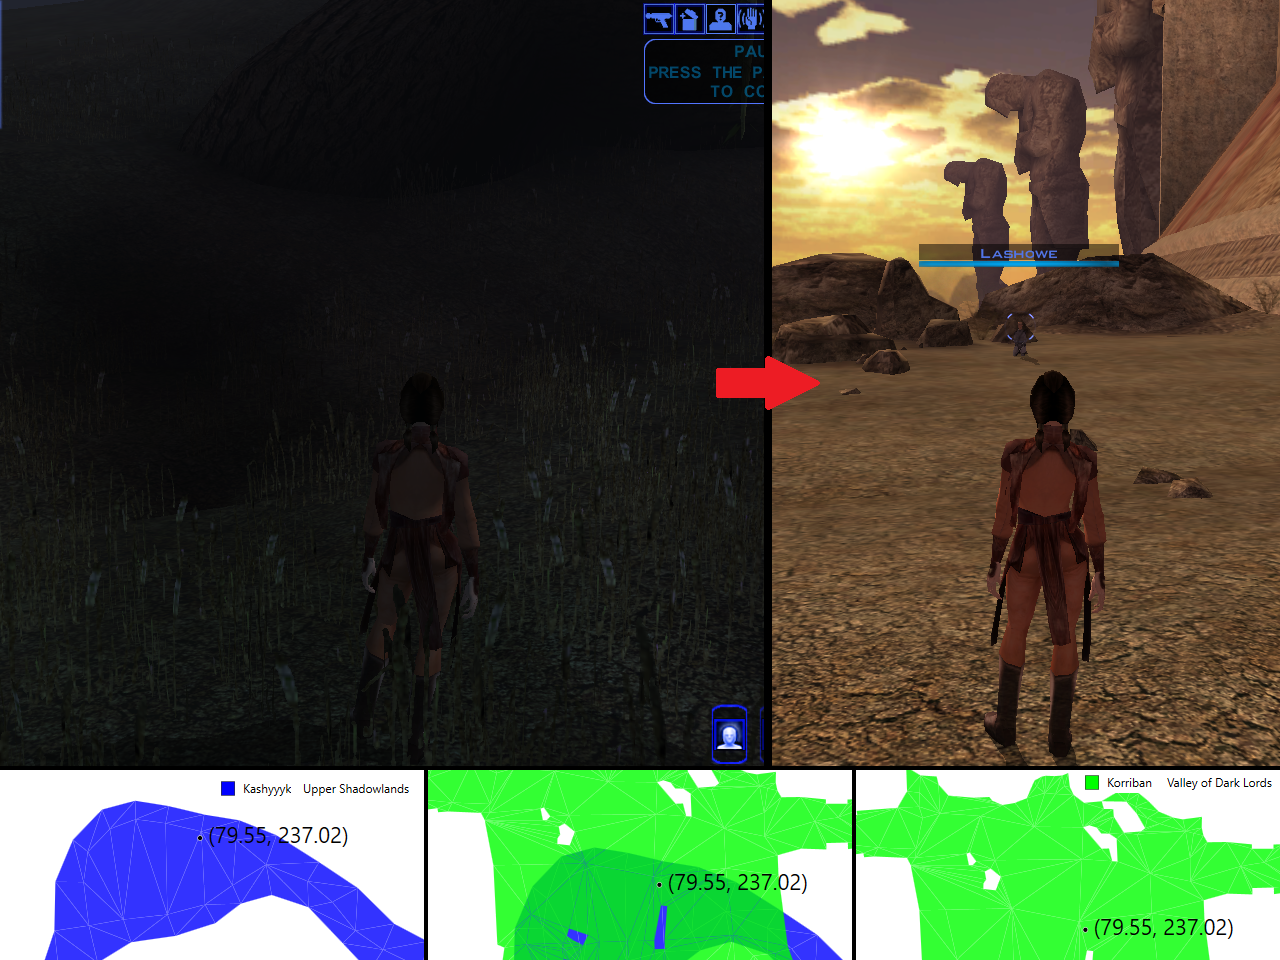
This warp is used to send Bastila to the far side of the Valley of the Dark Lords, avoiding a lot of running. Triggering Lashowe’s conversation with Bastila then warps MC to the far side of the Valley, so that the Tomb of Naga Sadow can be reached.
Positioning Image
Video of Warp
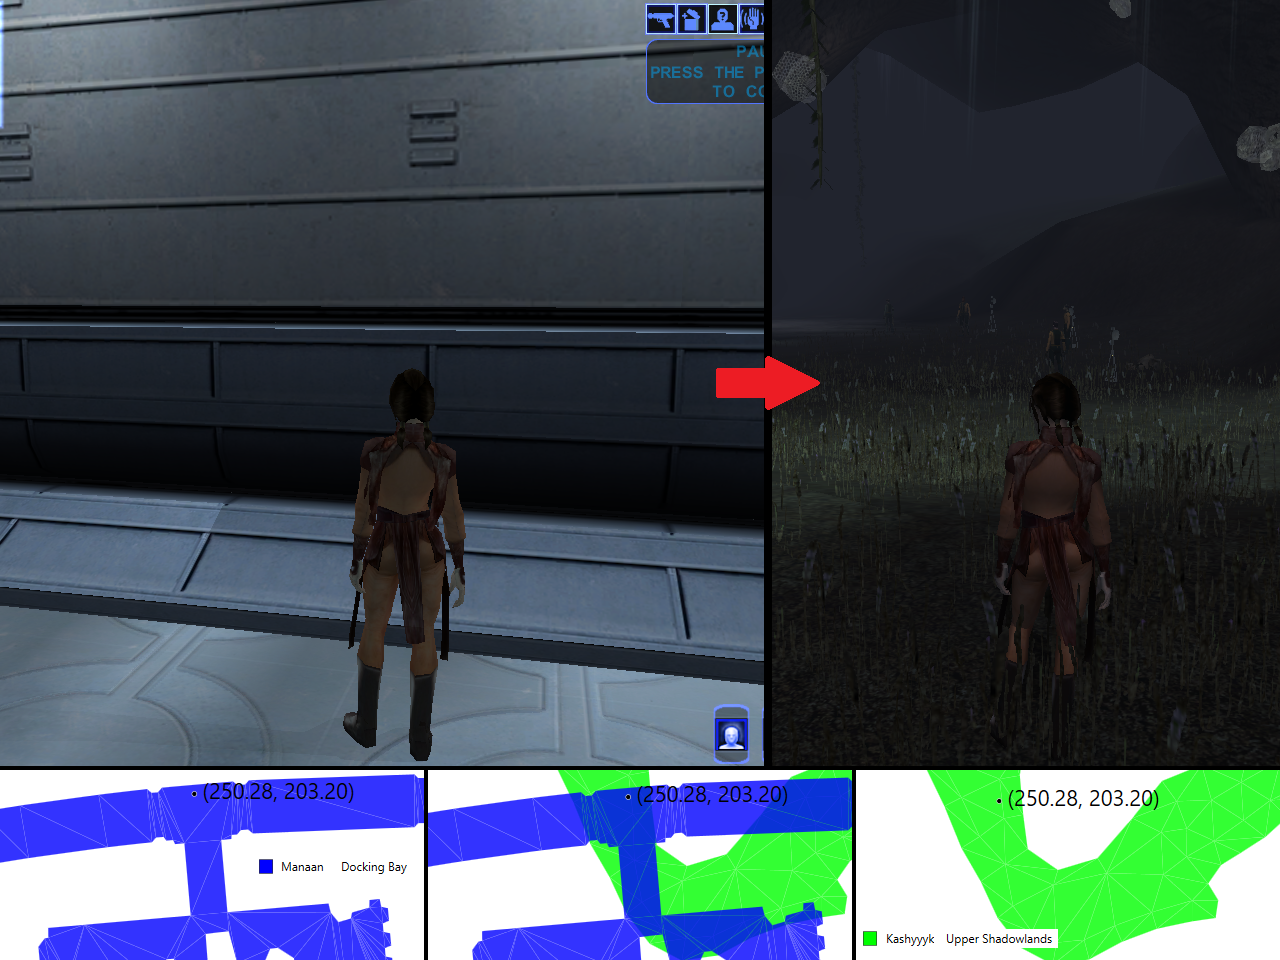
This warp is used after obtaining the West Central Autosave to warp Bastila next to the Czerka Poachers. This saves movement in the Upper Shadowlands and sets up for an Autosave Hotshot back to West Central.
Positioning Image
Video of Warp
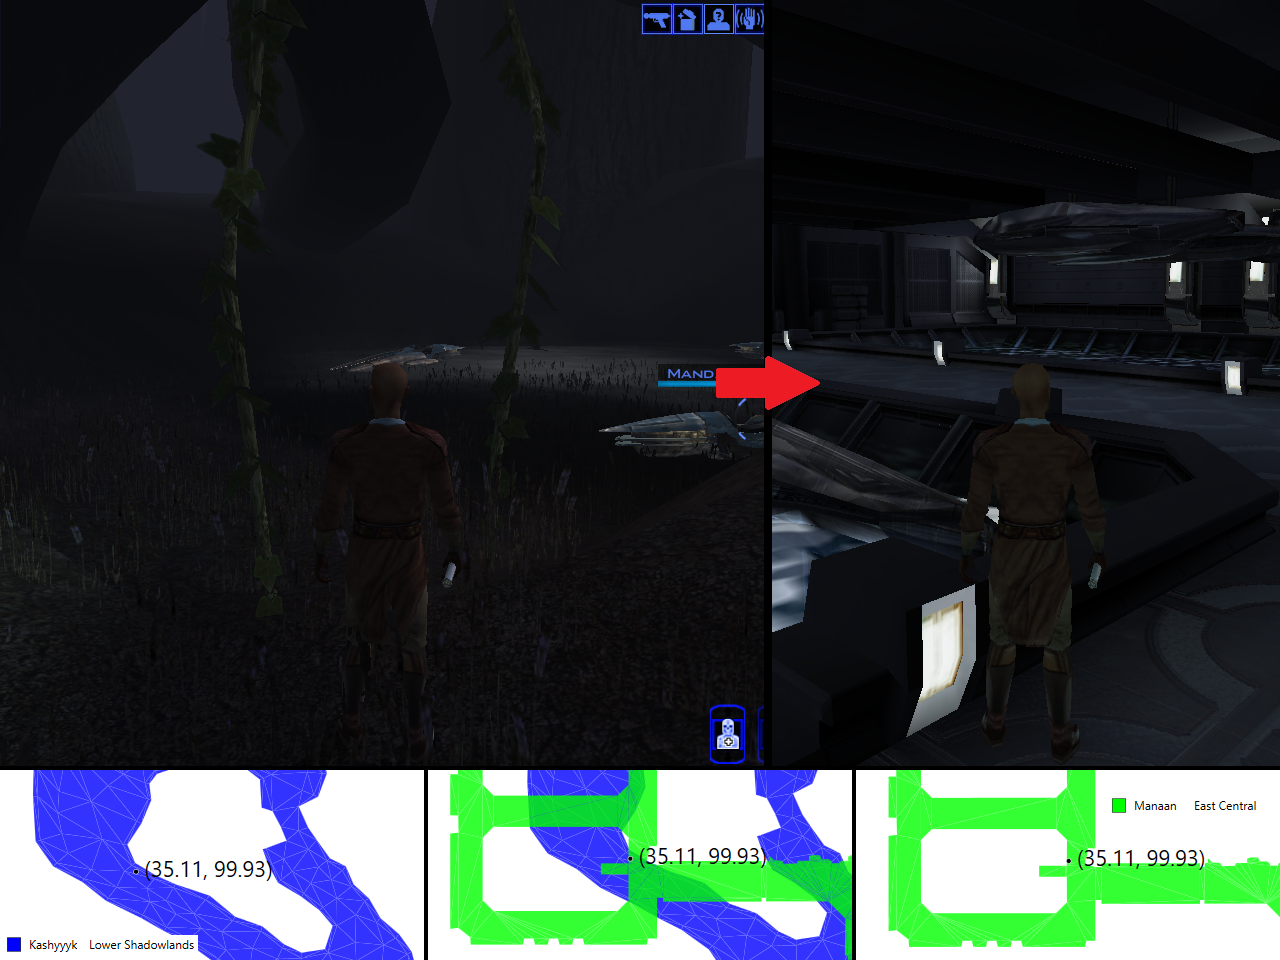
This warp is used to obtain the Kashyyyk Star Map quickly with Jolee. It also sets up a Coordinate Warp back to East Central to reach the Submersible.
Positioning Image
Video of Warp
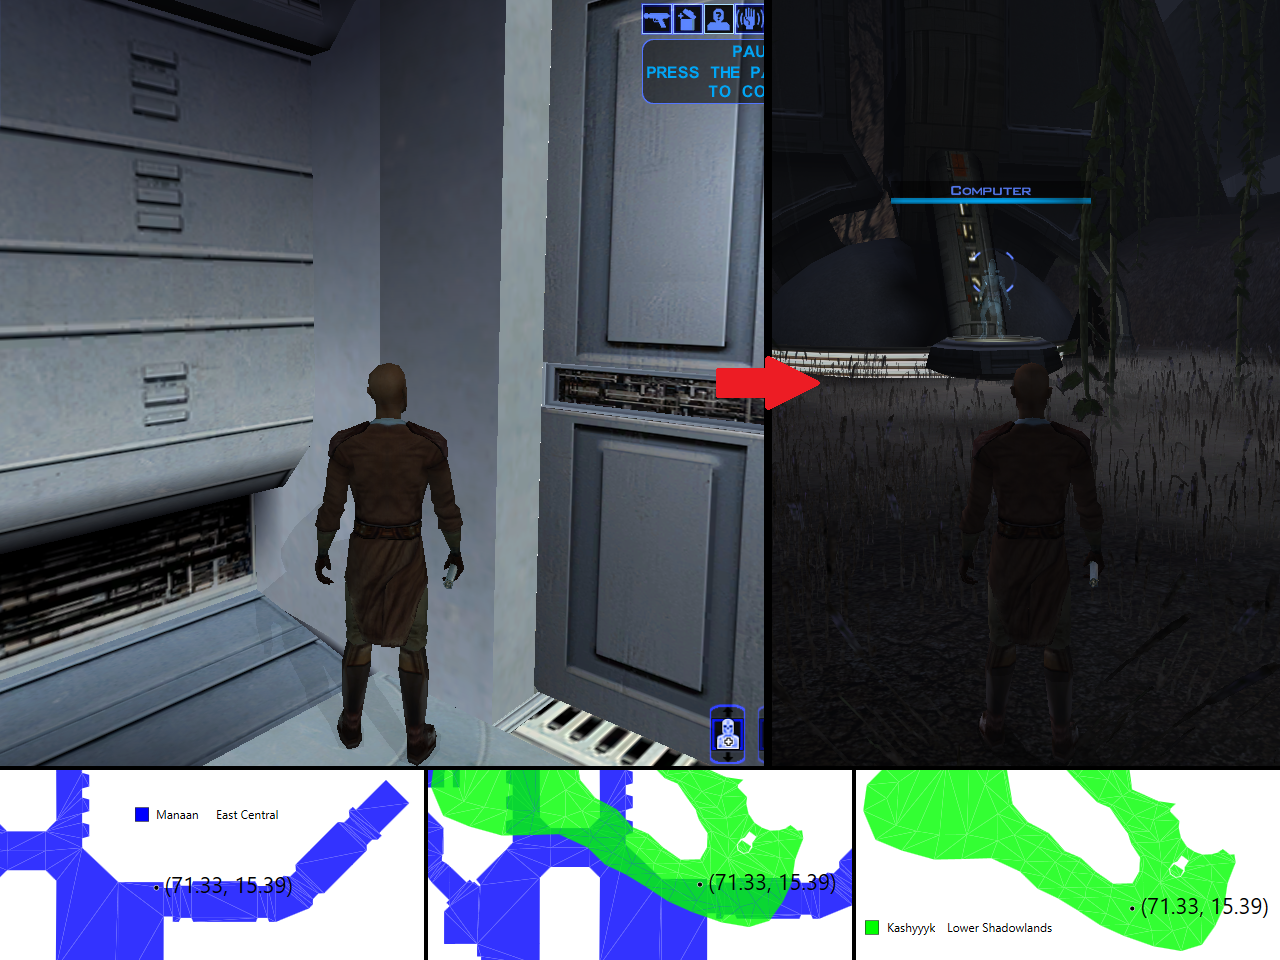
This warp is used to reach the Submersible to Hrakert Station right after obtaining the Kashyyyk Star Map. This skips the entire Manaan Sith Base and saves movement in East Central.
Positioning Image
Video of Warp
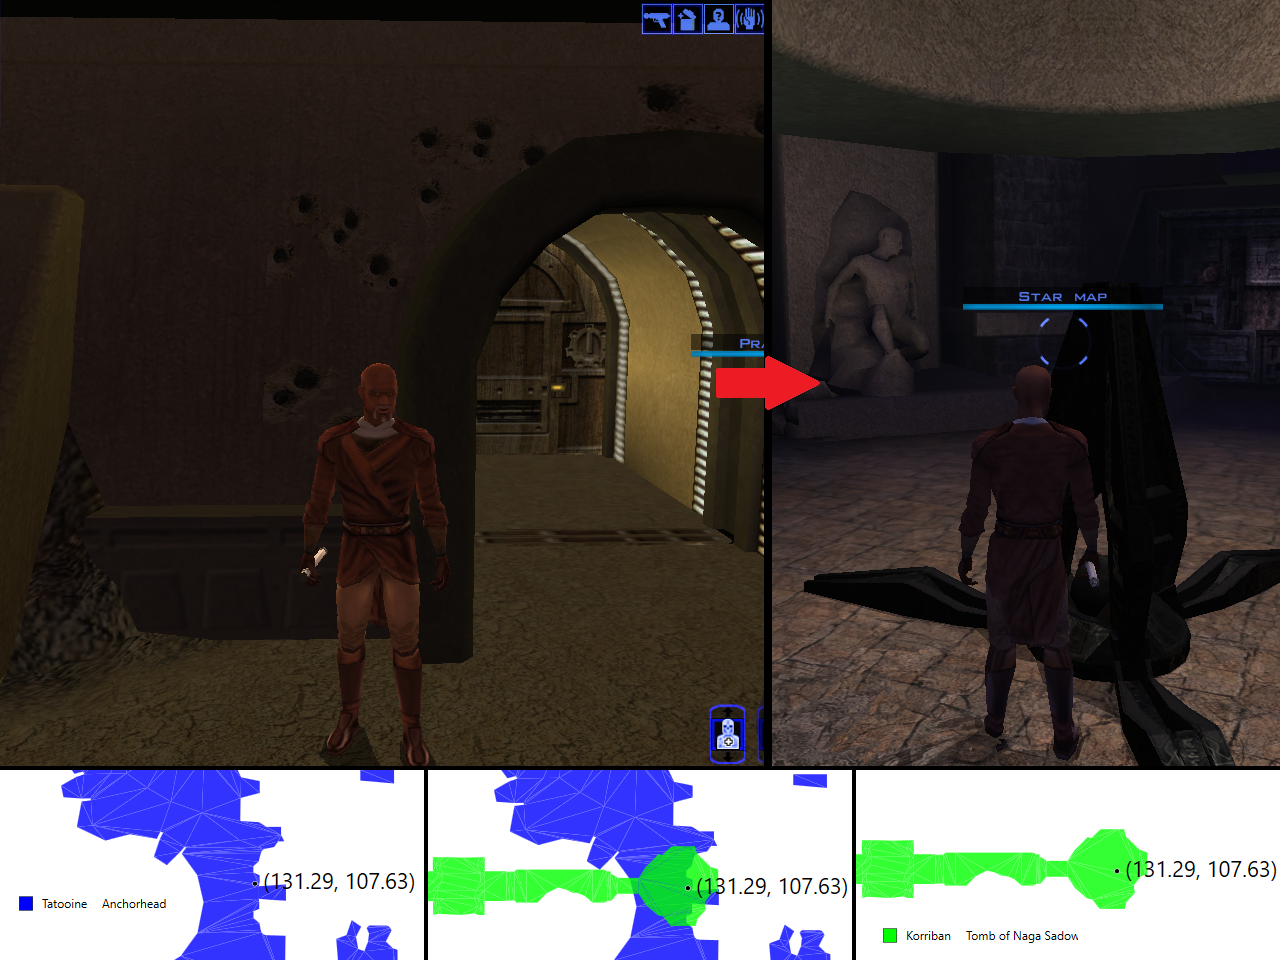
This warp is used to obtain the Korriban Star Map with Jolee. This skips the entire Sith Academy segment, including the fight with Uthar and Yuthura and all of the prestige gathering.
Any of Jolee’s spawn locations upon leaving the Czerka Office will result in valid coordinates for the warp, so he does not have to change positions before the Neo Hotshot.
Positioning Image
Video of Warp
This warp obtains the Envirosuit directly after the Korriban Star Map. It skips running through Hrakert Station, which is normally one of the most dangerous parts of the run. Thus this warp helps to enable Plot Armor Skip for All Star Maps.
Positioning Image
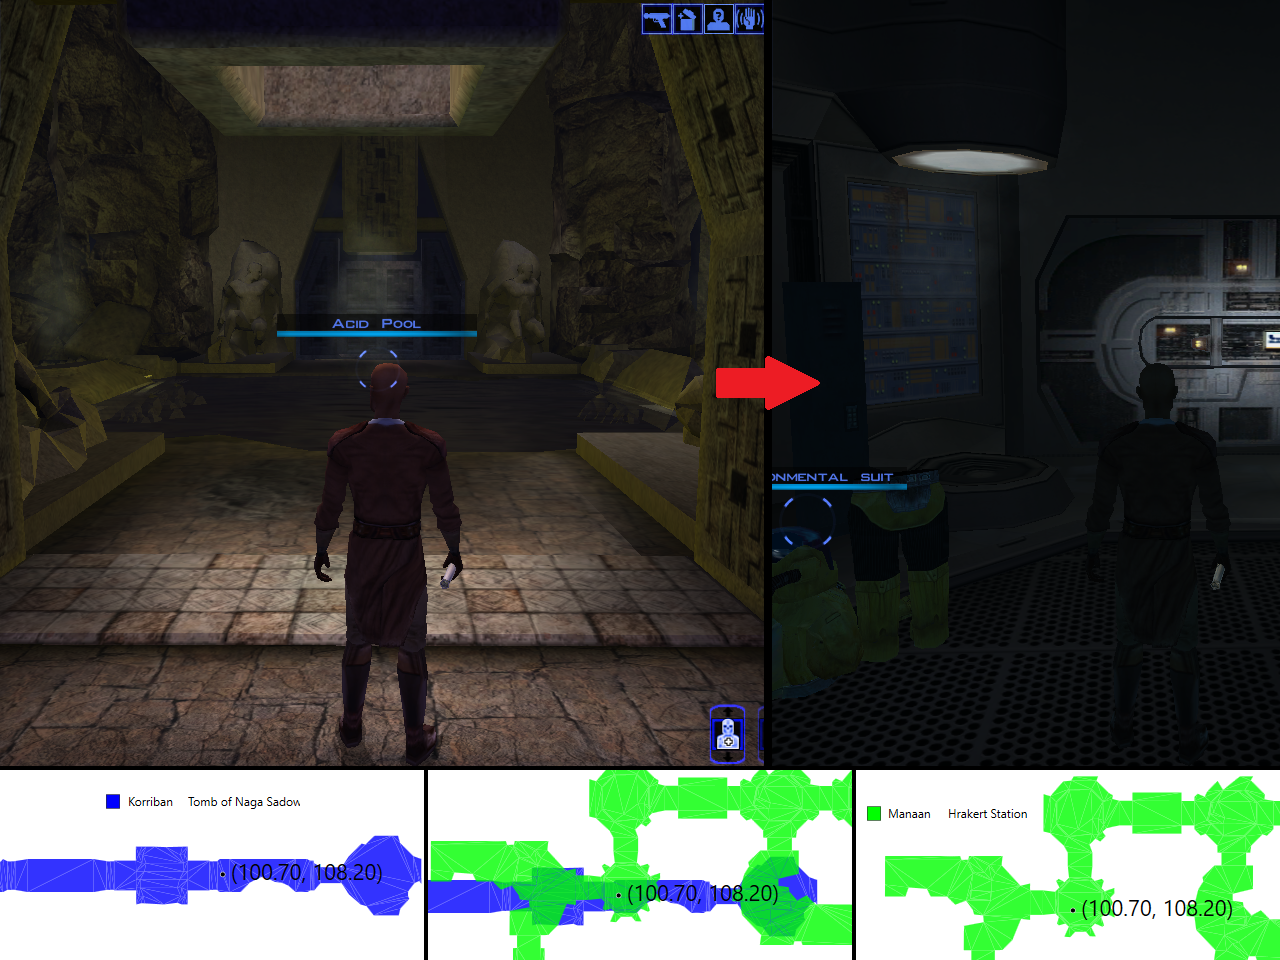
Video of Warp
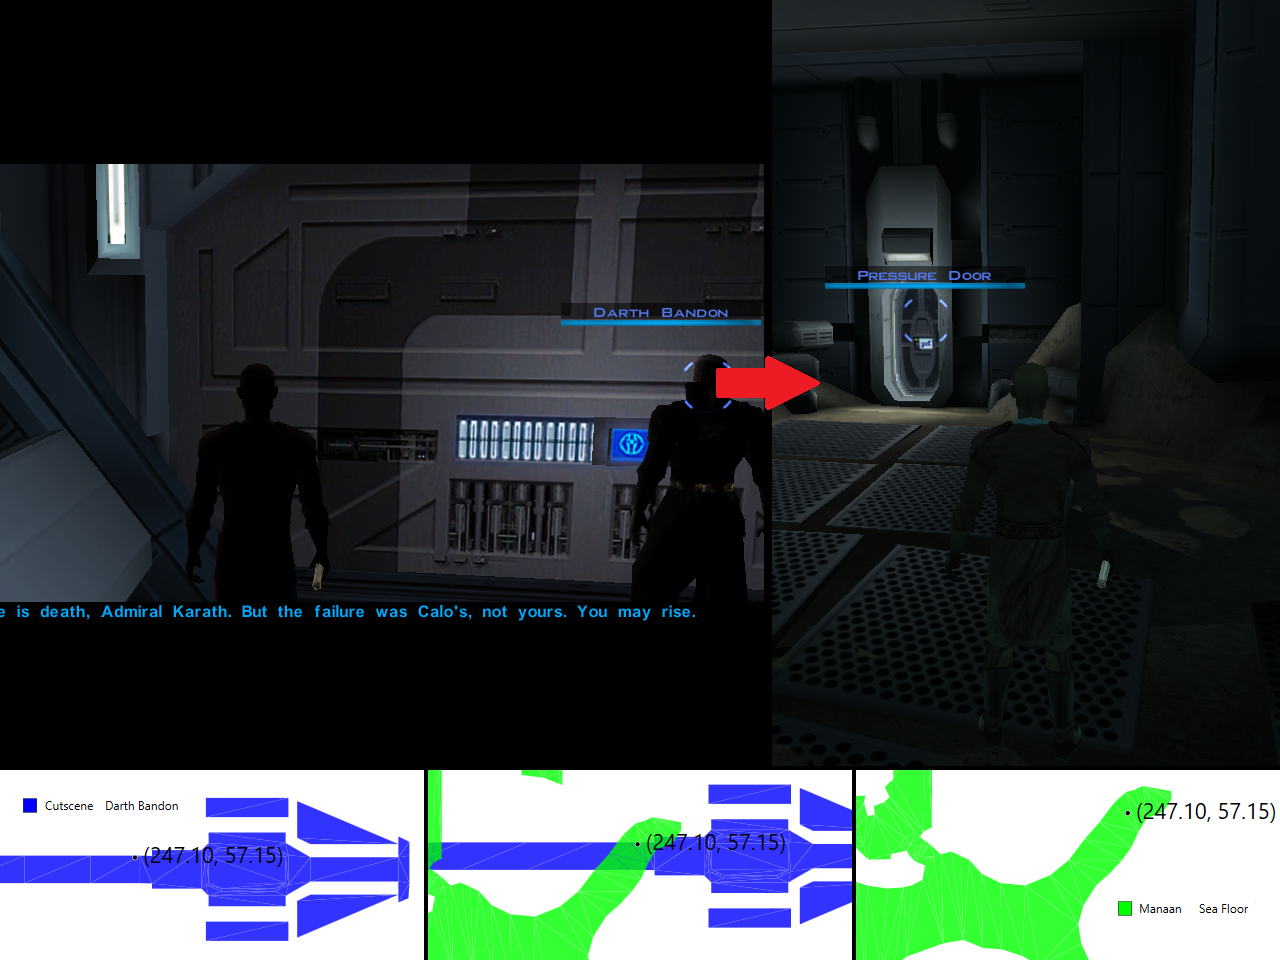
This unique Coordinate Warp uses coordinates from the module STUNT_14, which shares coordinates with the bridge section of Leviathan Bridge. STUNT_14 is reached by intentionally triggering the Darth Bandon cutscene by flying the Ebon Hawk after 3 Star Maps are obtained. The Anywhere Menu Glitch then allows us to gain control during the cutscene, add Jolee, and move him to the correct coordinates.
The difficult part of this warp is that, since it occurs during a cutscene, hotkeys are disabled and the mouse cursor is invisible. Thus blind mouse movement is needed to open the Map Menu, close the Party Select and Map Menus, and then open the Options Menu twice while performing the Neo Hotshot.
Once complete, this warp skips the entire Sea Floor module, including the Firaxan Sharks that can instantly kill the player. This warp, along with an Autosave Hotshot to Hrakert Rift, enables both Disguise Skip and Plot Armor Skip in All Star Maps.
Positioning Image
Video of Warp
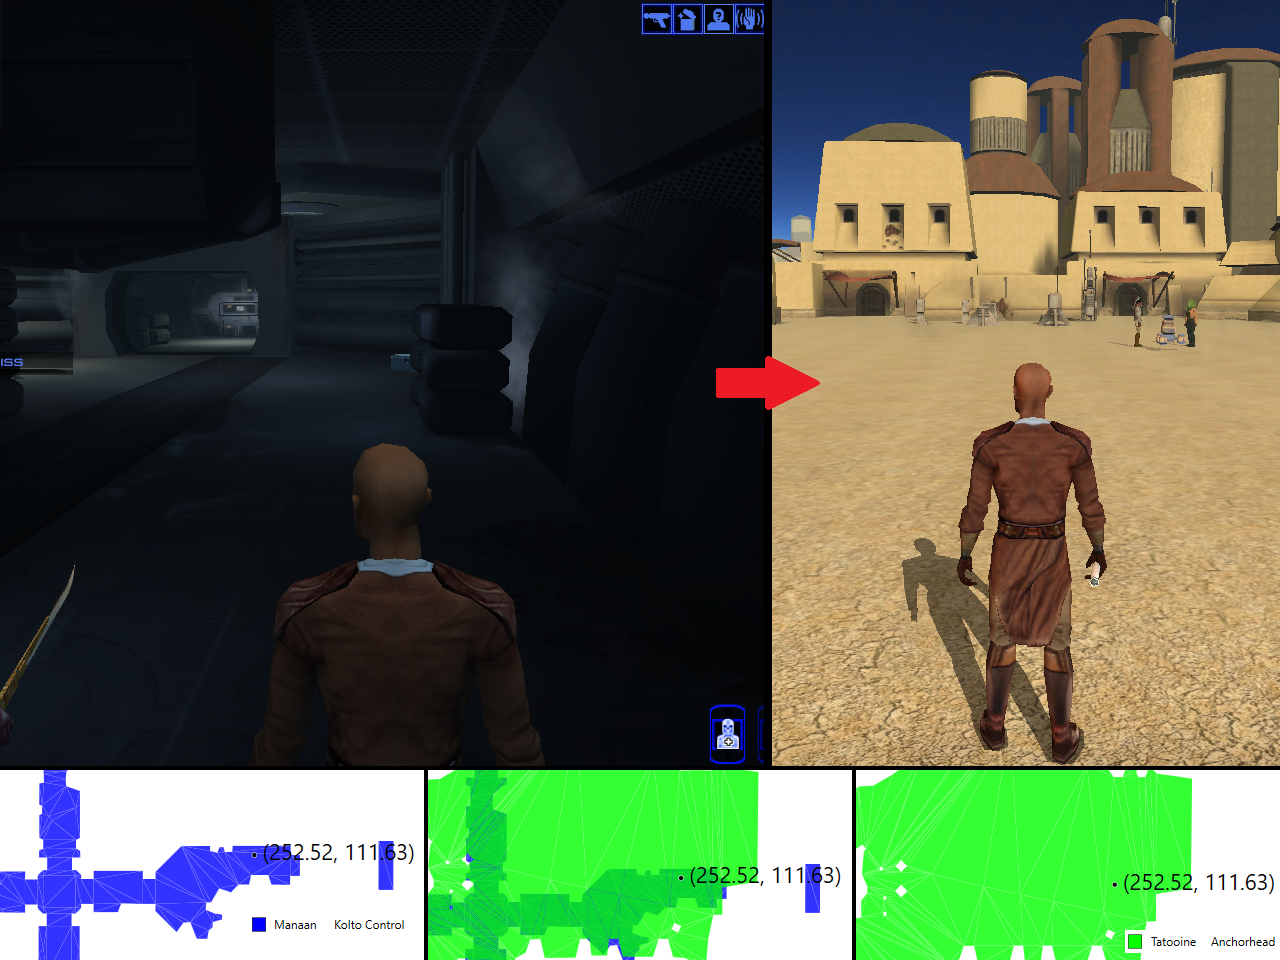
This warp is done as soon as Kolto Control is reached, and warps Jolee to the end of Anchorhead right near the gate guard to the Dune Sea. This sets up a return Coordinate Warp as well as an Autosave Hotshot to Hrakert Rift.
Jolee has the correct coordinates no matter where he spawns upon entering Kolto Control, so the Neo Hotshot can be done immediately.
Positioning Image
Video of Warp
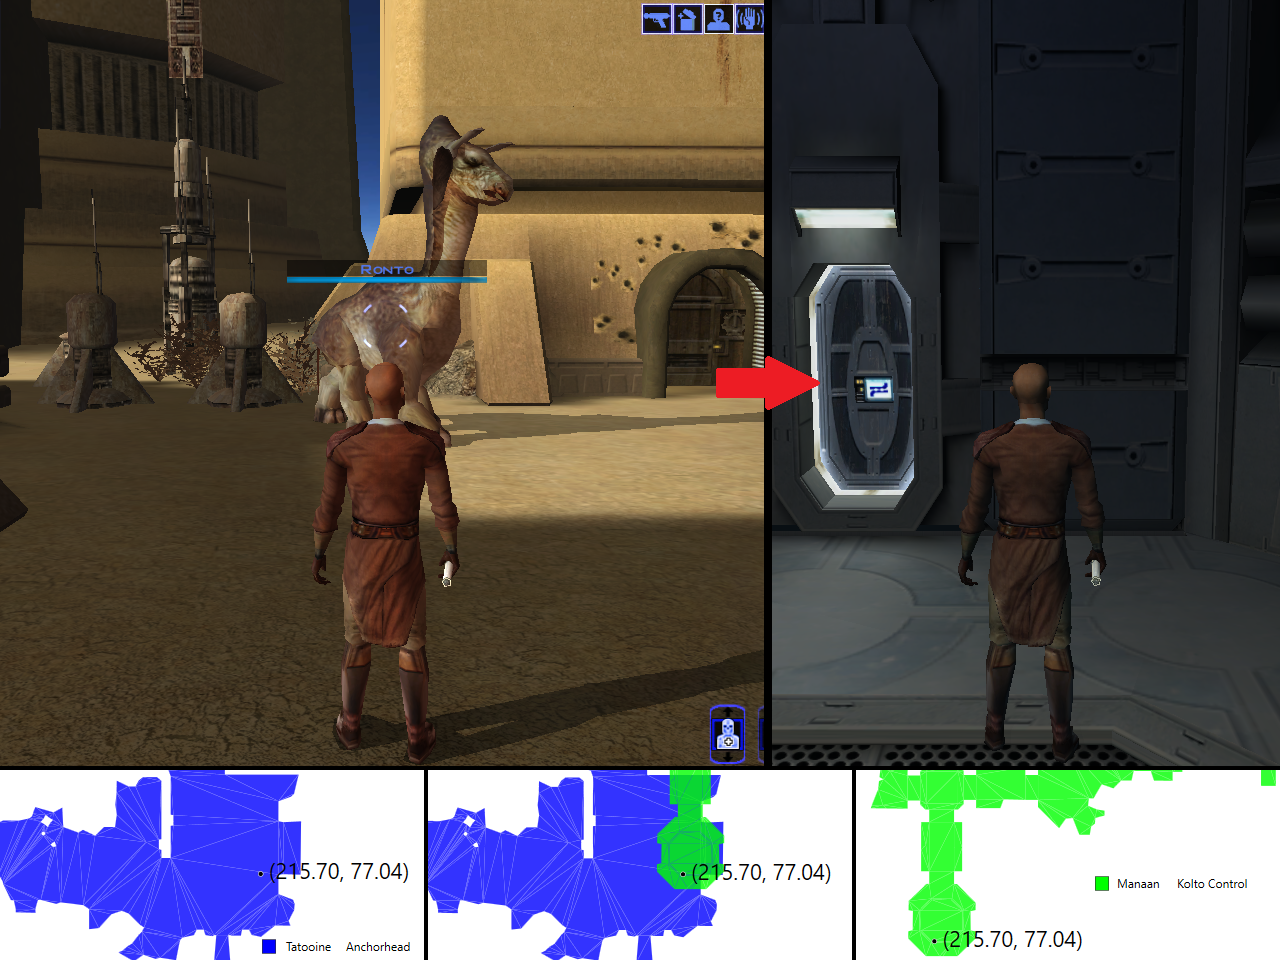
This warp is done to bypass the force field and scared scientists in Kolto Control and thus obtain the Hrakert Rift Autosave. Make sure to stay far enough away from the ronto, or Jolee will be out of bounds in Kolto Control.
Positioning Image
Video of Warp
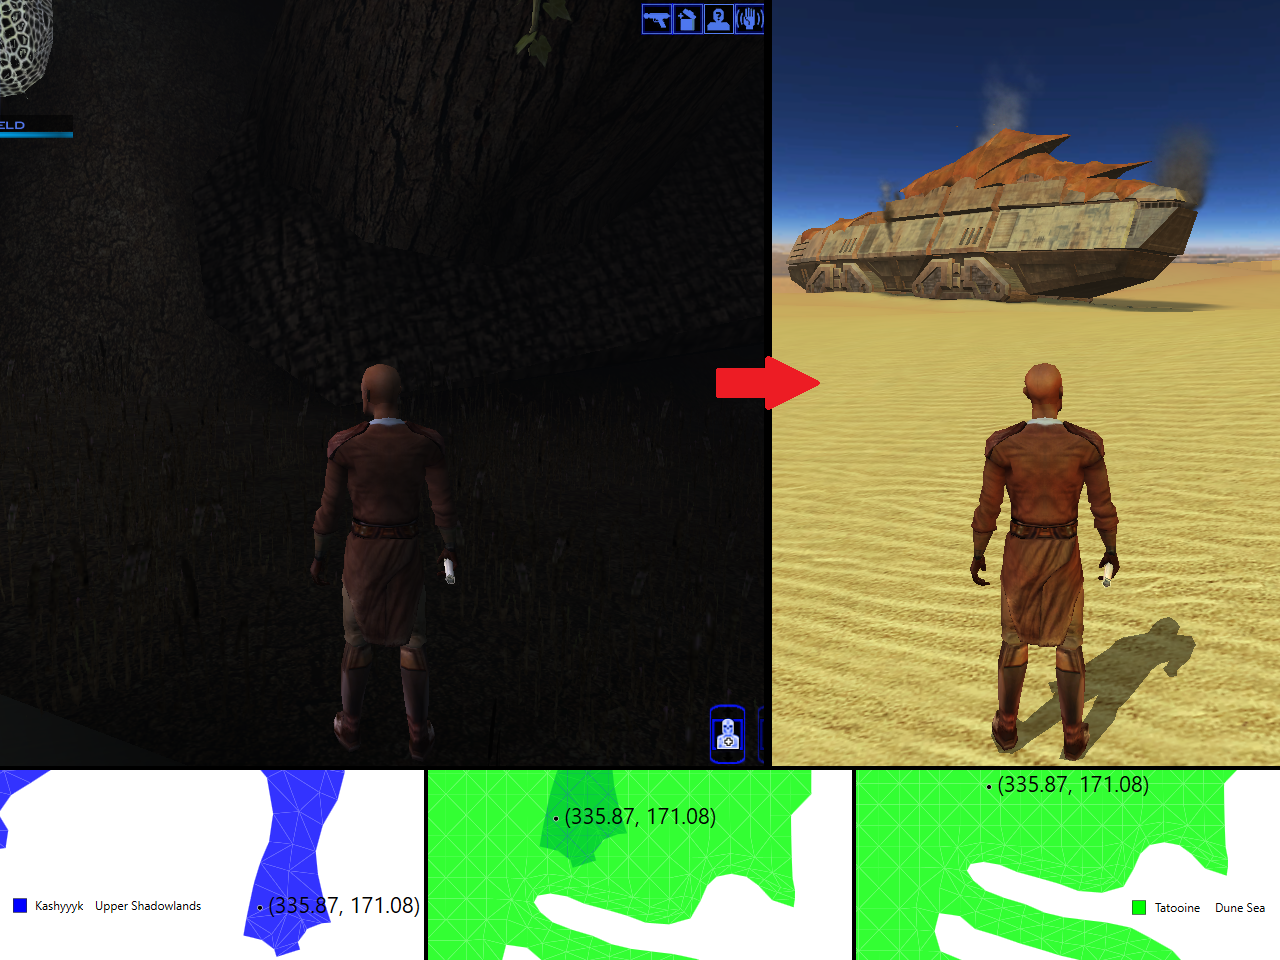
This warp is the second of two successive Neo Hotshots, and uses the coordinates near the force field in Upper Shadowlands to warp Jolee to the Dune Sea, close to the Eastern Dune Sea entrance.
The first Neo Hotshot goes from Hrakert Rift to Upper Shadowlands. It requires Jolee to move away from the Star Map first so that his coordinates will be out of bounds in Upper Shadowlands, causing him to spawn at MC’s last position next to the force field.
Positioning Image
Video of Warp
Coming soon!
There are a myriad of other Coordinate Warps in KotOR, since the mechanics of them are quite flexible. Some of these may be useful in either Randomizer or Bingo, while others have been used in the past. They include:
If you’re looking to discover or design your own Coordinate Warps, some tools that can help include:
warp to travel between modules and whereami to get exact coordinates