Table of Contents
Coordinate Warping is a Hotshot technique that warps your party members to any coordinates in the Destination Module that they can reach in the Start Module. Since party member coordinates persist when doing a Hotshot, we can use this to help party members bypass locked doors and reach certain areas early.
While the details of each Coordinate Warp vary from situation to situation, they all follow these two general steps:
Note that Coordinate Warps do not work with Autosave Hotshots; party members will always spawn near the default spawn for the module when performing an Autosave Hotshot. However, Coordinate Warps can be done with Main Menu Hotshots, even when done as a Forward Hotshot.
A Coordinate Warp can be done “within” a module by temporarily Hotshotting to another module that has the coordinates you want, then immediately Coordinate Warping back to the original module. This is used in a few places, and if the save in the temporary module is done in the right position, the two Hotshots can be chained together, commonly called a Double Hotshot.
The type of Double Hotshot you use depends on which module you want that Hard Save to end up in. A Double Neo Hotshot or a Double Quick Save Hotshot will both leave the Hard Save as it was, whereas a Mixed Double Hotshot (a Neo Hotshot followed by a Quick Save Hotshot) will change the Hard Save to the module you’re warping within.
When you Hotshot, the locations that party members spawn in the Destination Module follow this logic:
In addition, if a party member’s coordinates are in-bounds in the Destination Module but on “non-walkable mesh”, then the party member will move to nearby walkable mesh wherever possible. This will cause the party member’s coordinates to change slightly, such as what happens to Carth in the above video example.
The following modules contain the origin (0,0), and thus OoB party members will spawn there for any Hotshot to that module. Modules in italics have the origin in non-walkable mesh:
The following sections contain details for all Coordinate Warps used in each Unrestricted speedrun. Coordinate Warps have a few main uses:
All of the warps list the following information:
Note that only true Coordinate Warps are listed here; Unrestricted runs use many other Hotshots that don’t care about the positions of party members, or specifically want them to be out of bounds to take advantage of the party spawn rules.
Jump to a specific run or warp:
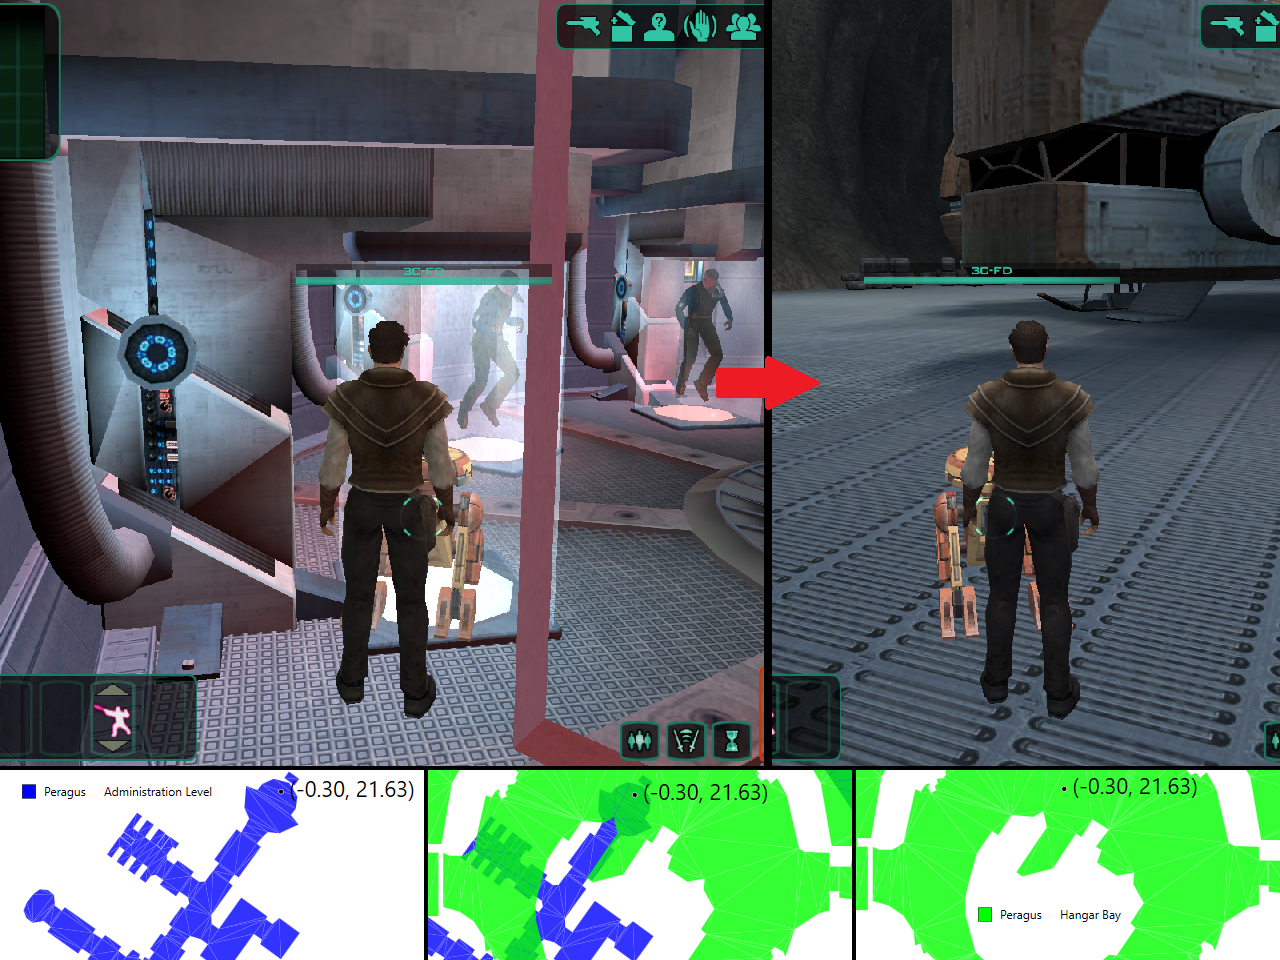
This Coordinate Warp uses a Load Menu Hotshot to place party members in the Kolto Tanks area at the start of the Administration Level, which has the right coordinates to warp back to the Hangar Level with a Neo Hotshot. With the help of the Dev Droid, this skips all of Peragus except the Admin Level.
Positioning Image

Video of Warp
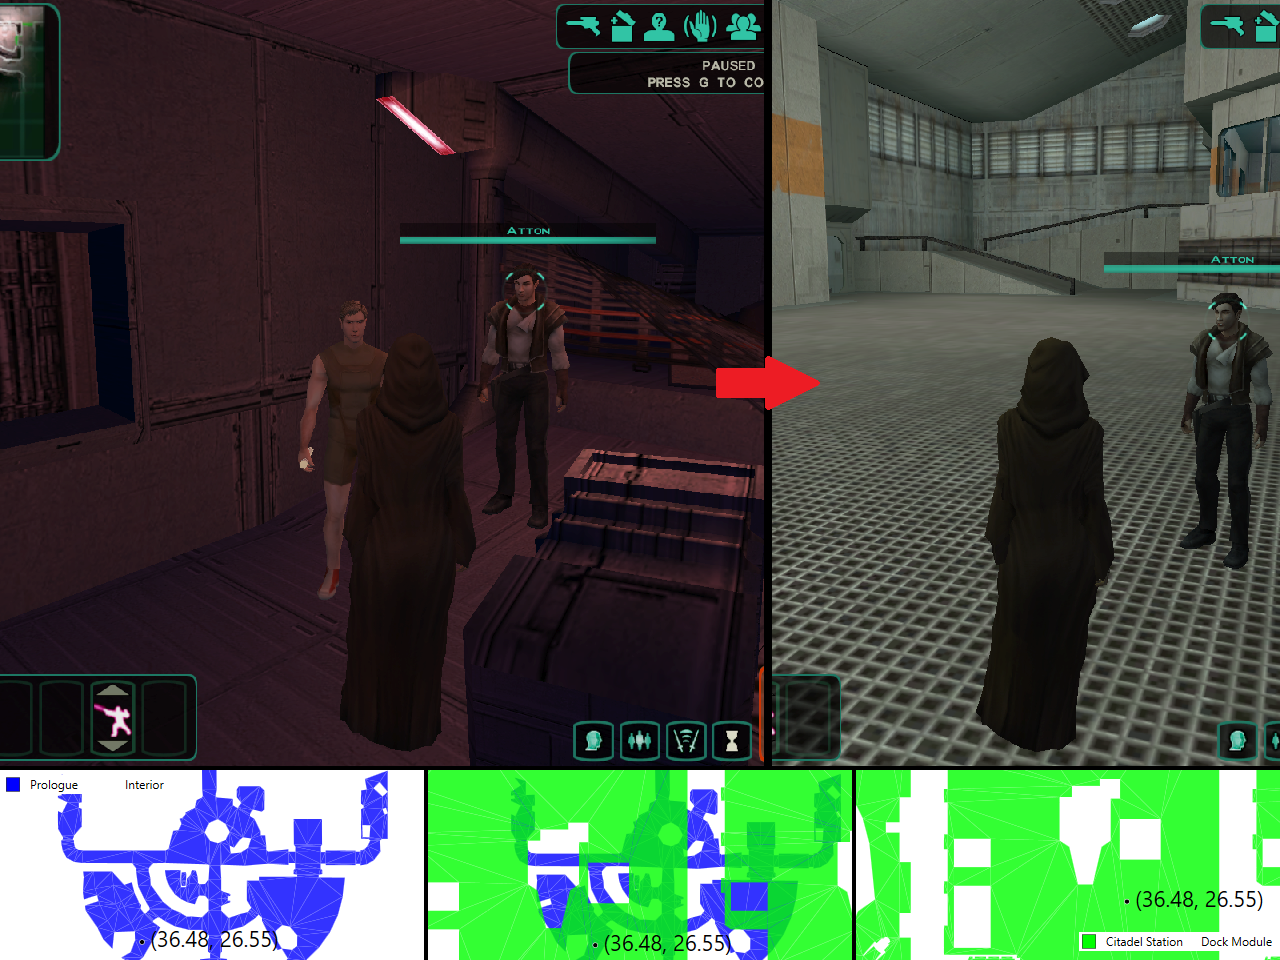
This Coordinate Warp uses a QS Hotshot to return to the Prologue Hawk, whose last location in the storage room has the right coordinates to warp back to the Hangar Level and reach the Ithorian Shuttle. This skips the entire detention sequence of Citadel Station.
Positioning Image

Video of Warp
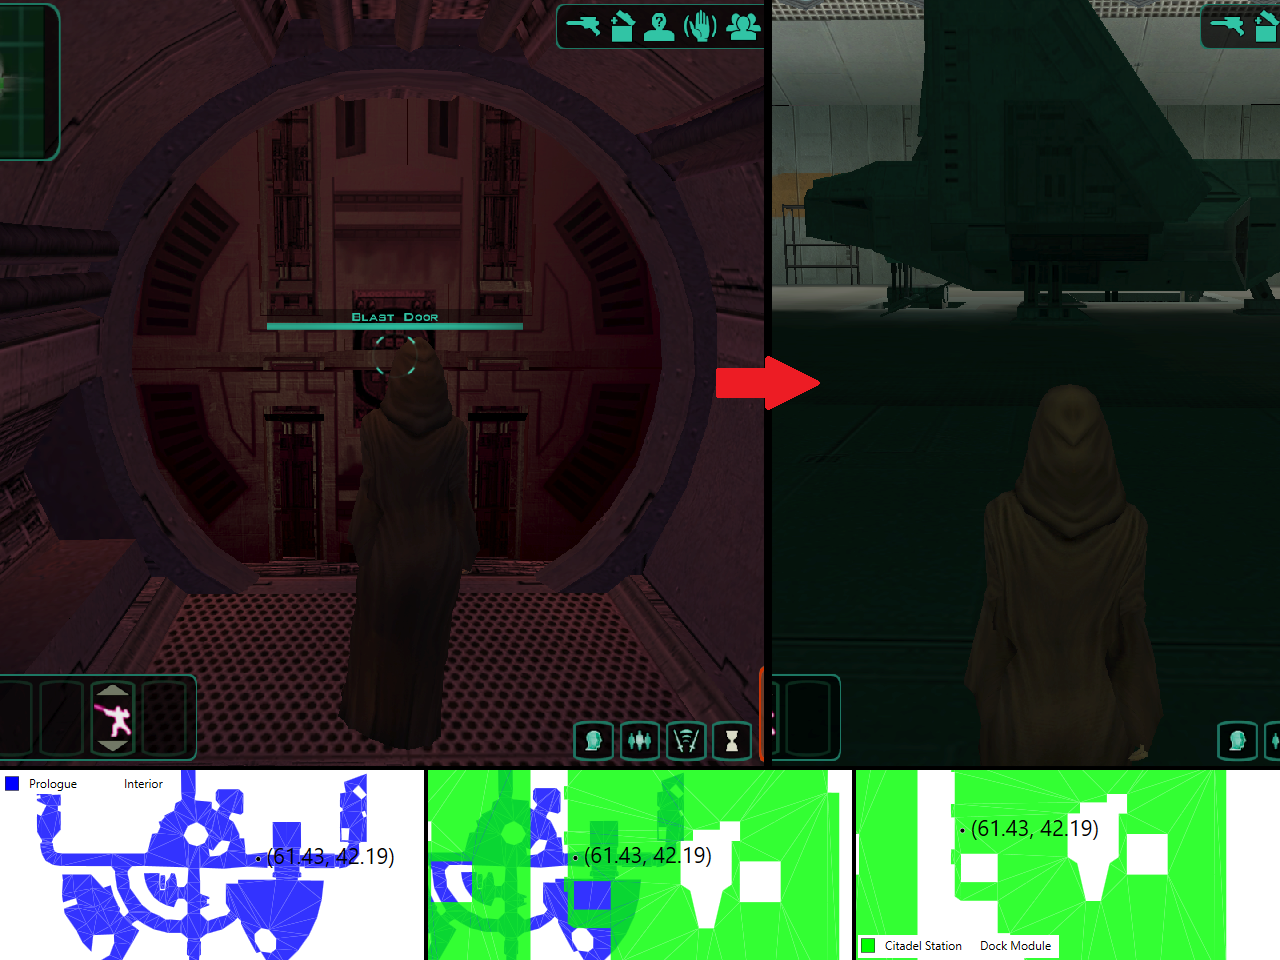
This Coordinate Warp positions Kreia in a short hall ending at a blast door, which is just far enough for the Neo Hotshot to place her in the Czerka Hangar upon warping to the Dock Module. This warp is used to quickly board the surface shuttle after speaking with Jana Lorso in the Czerka Offices.
Positioning Image

Video of Warp
This Coordinate Warp is the second half of a Mixed Double Hotshot that uses a Load Menu Hotshot to place Kreia and Bao-Dur in the Prologue Hawk’s cockpit, which is the right coordinates for the Neo Hotshot to just spawn them in the corner of the shuttle bay in the Underground Base. This would be a fairly precise warp without the convenient save made in the first second of the run.
There is unfortunately no better Coordinate Warp to deeper in the Underground Base with the modules available at this point in the run. Additionally, the first Hotshot could be a Neo Hotshot, but both Kreia and Bao-Dur would need to be positioned in the Prologue Hawk’s cockpit, and the timeloss means a Load Menu Hotshot is preferred even with the possible inconsistency.
Positioning Image
Coming soon!
Video of Warp
Coming soon!
This Coordinate Warp is the second half of a Double Neo Hotshot. Once Polar Academy is reached, we warp to Czerka Offices to add 3C-FD and Kreia to the party (since it cannot be modified in the Polar Academy). The coordinates just happen to conveniently warp them deeper into the Academy than where we started, but only a little movement is saved by this; the main point is to bring the Dev Droid so it can start the endgame.
Positioning Image
Coming soon!
Video of Warp
Coming soon!
This Coordinate Warp is used to place each party member near one of the four proton core sites on the Ravager’s Command Deck. It saves a significant amount of movement on the Ravager and avoids many dangerous enemies. The second party member used should be an organic member (in case Revitalize is needed) that isn’t Mandalore or Visas (to avoid cutscenes). This party member will take heavy fire and having a level up ready for healing is ideal.
This warp can be set up with identical positioning using the Residential East module from peacetime Citadel Station, but depending on whether or not you choose to use Exchange DLZ, you may not have even visited that module or have a hard save to use to setup the warp.
Positioning Images
Coming soon!
Video of Warp
Coming soon!
This Coordinate Warp skips most of the movement in Malachor Surface. It must be done as a Forward Hotshot because the Polar Academy module was deleted upon reaching Wartime Citadel.
Positioning Images
Coming soon!
Video of Warp
Coming soon!
This is not a true Coordinate Warp, but instead uses the property that causes OoB party members to spawn at the origin in modules that contain it. Since Malachor Depths contains the origin right outside Trayus Academy, warping there with any OoB party member skips the entire module.
Doing this as a Double QS Hotshot is both fast and consistent, but a first try Forward Hotshot using the Ravager Exit save has the same effect and can be just as fast.
Positioning Images
Coming soon!
Video of Warp
Coming soon!
This Coordinate Warp skips the entire Trayus Academy, including going through either Trayus Proving Grounds or Trayus Crescent, to go straight to Trayus Core and the fight with Darth Traya. It must be done as a Forward Hotshot since the Ravager is deleted upon reaching Malachor Surface.
Positioning Images
Coming soon!
Video of Warp
Coming soon!
There are a myriad of other Coordinate Warps in KotOR II, since the mechanics of them are quite flexible. Anytime two modules share coordinates, a Coordinate Warp is possible (though possibly not useful). If you’re looking to discover or design your own Coordinate Warps, some tools that can help include:
warp to travel between modules.